
DAY 1

With November comes the 08Romeo annual. This is the second annual and should be rather painless, well, painless with regard to over use of the AMU's. I'm up early with the plan to fly 08Romeo to Cecil Aero at 58M, Cecil County Airport in Elkton Maryland. Winds are gusty this morning and the flight requires a twenty degree crab to maintain heading. I know this is going to be a fun pattern but winds should be pretty much down the runway.

I announce position and make way to cross midfield entering the left downwind for runway three one. Down wind to base a bit extended but a nice landing and roll out to Cecil Aero. I walked into the office and met Frank who was working on the morning coffee. We needed to swap some planes around in order to get 08Romeo in the shop. I walked outside into the shop and there sat a gorgeous Stearman. After I drooled all over it we repositioned it and another aircraft outdoors so my Sundowner could get inside.
 Now to the task at hand. Cowlings were first to be removed and a compression check completed. The numbers looked great on all four cylinders at 76/77/76/77 PSI each. The plugs were cleaned and replaced along with switching a CHT gasket probe from number one cylinder to number three. I want to see if the high temp follows the probe. I had one washer gasket probe break (no. 2 cylinder)so I switched that one to a Bayonet Type probe. I'm sure next annual I will switch out the remaining three or make the swap during the year. I also had a small oil leak under two of the valve cover gaskets, they were just starting to seep, I had all four replaced. The best thing about Cecil Aero is they let you get hands on doing this stuff and really help you understand what makes your plane work.
Somewhere along the way we took a lunch break and then got right back to it. I removed a wing tip for access to the left leading edge landing light and for a more detailed wing inspection. Keith inspected my switching of the CHT probes and asked me to add a few more tie wraps to keep things a bit more secure and that overall it looked neat and orderly. It will be nice to have the new probe to compare CHT numbers and the best part about the bayonet probe is it will not have to come off each time a plug is removed, it has a permanent access on the botttom of the cylinder head.
 |
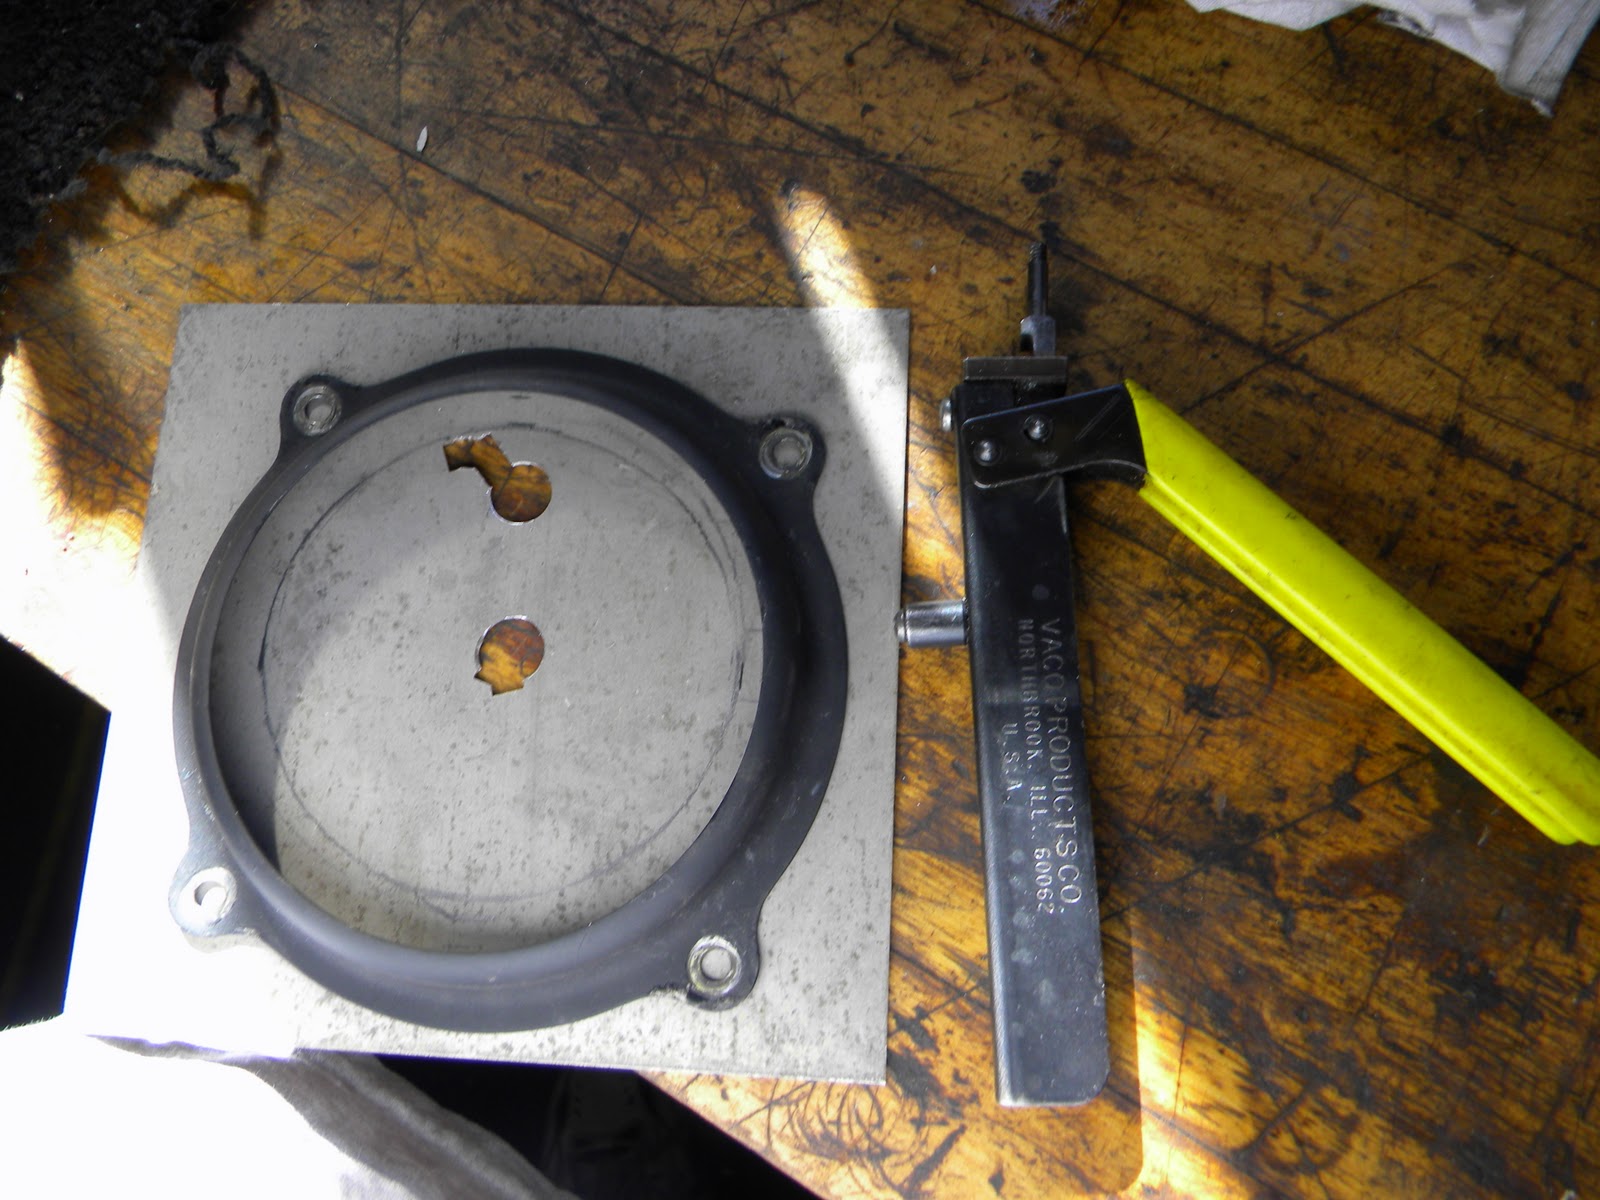
| start of the back plate |
 |
| preliminary hole cut....now to file |
Day 2
 |
| A/P roll servo |
Another early morning hot hot shower followed by a tricky set of maneuvers to get dressed, yikes! muscles are sore. Mary drives me to the Wilmington airport to pick up my SUV so I have transportation, you should have seen me crawl into her car. I was too tired and sore last night to stop for my SUV after she had picked me up at Cecil Aero. I packed a lunch for today, extra chick-fila from last night and a big slice of apple pie Marys Mom had left us. Mary headed to work and I left for Elkton. I rolled in around 7:15ish and Frank already had the coffee on, it sure smelled good but I don't drink the stuff. Hot tea or ice tea for me and I had downed a full travel mug of ice tea in the forty minute ride to the shop.
 |
| servo location |
Time to get started with the plan for today. I put in a call to Penn Avionics to see about testing the roll servo from the Auto Pilot and they said bring it up. No sense paying the avionics shop to remove the interior to get to the equipment when annual requires the floor to be opened up. Keith removed the unit noting all the cable connections. I was set to go.
I loaded up the roll servo and grabbed my lunch. Today's lunch was obviously going to be on the road. It takes a good forty-five minutes with traffic to get home and it will take an additional thirty or so to get to Penn Avionics at the Brandywine Airport. I didn't stop at home but had to pass a mile away from it on my way back and forth. Ken at Penn accepted the hand off and said he would get to it as soon as they finished up lunch, this worked out great. I could visit the FBO folks and stop by the flight school too. I guess I could have had that slice of pie but I held off. I walked back to the shop as Ken was coming into the lobby. I got a debrief on the unit, a wiring diagram for the Century I hook up and agreed I would schedule shop time to get the A/P unit checked upon completion of the annual. Oh, the bench test was no charge and the diagram was free too, life is good!

I loaded up and headed south, back to Cecil Aero. I guess I could have called it a day but I really wanted to get back and get a few more hours working on the plane. I enjoyed the apple pie as I made my way south back to the shop. When I returned Keith said he had finished with inspections so I started to button up all the inspection panels. While Keith climbed inside an reinstalled the roll servo and cables I went back to work on the Beech option additional taxi light in the left leading edge. We brainstormed a bit and came up with an idea to enable an adjustment of sorts to help aim the landing light. I would fabricate a backing plate that could sandwich the lamp between the retainer ring and itself yet allow adjuster springs like a car head light or the installation of washers to build out the angle when attached to the lamp mounting bracket. I can't remember the last time I did sheet metal work but suffice it to say it's been uh....many many years. I found a scrap piece of aluminum about six inches square and took measurements for the task. It was fun laying it all out and using a compass to set up the lamp cut out. Then the real fun started, I got to use power tools.

I drilled a pilot hole with a multibit,this would allow me to begin to cut the lamp hole out. I started with a hand nibbler until Keith introduced me to the air powered nibbler, yes,this requires a serious Tim the tool man multiple grunt. Reality check time here....ahhhh Keith you go first so I can see this thing work. He got a good chuckle and then demonstrated. Wow, very cool! I gave it a whirl and it sure cut down the time to open up the lamp hole. I switched back to the hand nibbler to clean up my work then went to a file and multiple sand paper/belts to get to a final product. The last step was a coat of flat black paint after a trail fit for the lamp and mounting notch.
 |
| broken washer gasket probe |
While I was playing fabricator Keith was finishing up the landing gear. Each gear was checked to make sure the jo-bolts were tight, and they were. Wheel bearings were cleaned and repacked, brake cylinders checked and passed, and the right side tire checked for cracking or flat spots. I considered changing it out to match the new tire on the left side but it was still in very good condition with plenty of tread remaining. I'm sore today but not as bad as yesterday, but trust me, I'm still feeling it. I told the guys in the shop when I got up this morning my arms were so sore that if I was held up by a thug I couldn't hold my arms up long enough...they would have to just shoot me, which would take care of the sore arms and body.
 |
| Storage area looking towards the tail section |
DAY 3

It's another early start to my day and I plan on making a pit stop for donuts for the guys and grabbing a large hot tea, extra sugar for me. Traffic is moving very well at 6:30am, it's a peaceful drive singing along with the oldies. I picked up the donuts and was asked if I wanted to "shoot the dozen", I said, do what? "Shoot the dozen" the young lady repeated with a chuckle. Ok, I give, what the heck is shoot the dozen I asked. Now she is laughing AT me and said you pick them out or it's a random sort from us. Ok, got it, toss in at least two Boston cremes and the rest have fun, it makes no matter to me. Whew...all that for donuts, I hope my fuel stop is easier.

Fuel was a breeze no tricky phrases just pump the gas and go. I rolled into the shop as Frank was opening up. Today's mission was to get 08Romeo completed. First order was to bring 08Romeo off the jack stands. Precaution was taken to make sure the wing areas were clear and slowly 08Romeo set her feet down on the shop floor, we're in the home stretch. Keith moved to the interior and got all the floor boards in and refastened the kick plates on each side in front of the rudder pedals along with all the hardware. I installed the LED landing light and used a flat black paint marker to paint the heads of all eight screws in the light assembly. Next I moved inside to install the four seats and all the belts and reload all my stuff into the baggage area. The UPS guy came early and my bayonet probe from Aircraft Spuce was on board. I opened the bundle of wires on the pilot side engine compartment and made the swap out. I neatly packaged the wires and got approval from Keith. Next came the fun part, run up and leak test. I fired up 08Romeo and we sat at idle until I had some oil temps in the yellow. We varied the rpm's from 1000 to 1700 to 2200. A small adjustment was made to the throttle and mixture. WE also performed the ignition and stand by vac 100 hour AD. All tests completed, we pushed her back in the shop to finish up. We hung the bottom cowl and I changed out the bracket air filter, man that thing is sticky and dirty. Next up was the top cowling being washed out at hung back on the plane. We were finished!

Fuel was a breeze no tricky phrases just pump the gas and go. I rolled into the shop as Frank was opening up. Today's mission was to get 08Romeo completed. First order was to bring 08Romeo off the jack stands. Precaution was taken to make sure the wing areas were clear and slowly 08Romeo set her feet down on the shop floor, we're in the home stretch. Keith moved to the interior and got all the floor boards in and refastened the kick plates on each side in front of the rudder pedals along with all the hardware. I installed the LED landing light and used a flat black paint marker to paint the heads of all eight screws in the light assembly. Next I moved inside to install the four seats and all the belts and reload all my stuff into the baggage area. The UPS guy came early and my bayonet probe from Aircraft Spuce was on board. I opened the bundle of wires on the pilot side engine compartment and made the swap out. I neatly packaged the wires and got approval from Keith. Next came the fun part, run up and leak test. I fired up 08Romeo and we sat at idle until I had some oil temps in the yellow. We varied the rpm's from 1000 to 1700 to 2200. A small adjustment was made to the throttle and mixture. WE also performed the ignition and stand by vac 100 hour AD. All tests completed, we pushed her back in the shop to finish up. We hung the bottom cowl and I changed out the bracket air filter, man that thing is sticky and dirty. Next up was the top cowling being washed out at hung back on the plane. We were finished!
I did some quick cleaning and we pushed 08Romeo back out front and locked her up. Mary will drive me down in the morning so I can settle up with Roger. I am also hoping the retaining ring for the taxi light comes in so I can get that installed. I'll do the flight check tomorrow and then do some fun flying in the local area since I have the day off.
The list of extra work activities:
- Replace CHT washer probe with bayonet probe
- R&R Auto Pilot roll servor
- Locate landing light retaining ring and order
- Fuel tank caps new O rings,2 each, each cap
- Oil Change and filter
- Fabricate back plate for landing light and install optional taxi light
2 comments:
Then the real fun started, I got to use power tolls.
^ Is there anything without a toll on the east coast? :-p
Great write-up on the annual! I really like how you get in there and get your hands dirty to learn the airplane inside and out.
Looking forward to seeing how the new light looks whenever you get that posted.
LOL....dang not even spell check can fix my typo's!
Best part of the annual (for me)is getting in there and learning about the plane, every cable, connection, nut,bolt and hundreds of screws!
I will have to stop back at 58M (10 minute hop start up to shut down) to pick up the ring. Once I get the lamp mounted I'll do a test at night.
Post a Comment